1.整合 JUnit
这里创建一个不包含任何功能(比如 web)的简单 SpringBoot 应用。
如何使用 Idea 创建一个 SpringBoot 应用可以看。
1.1.依赖
用官方的初始化器(Inilizer)创建 SpringBoot 应用会自动包含一个测试相关的 Starter:
<dependency>
    <groupId>org.springframework.boot</groupId>
    <artifactId>spring-boot-starter-test</artifactId>
    <scope>test</scope>
</dependency>
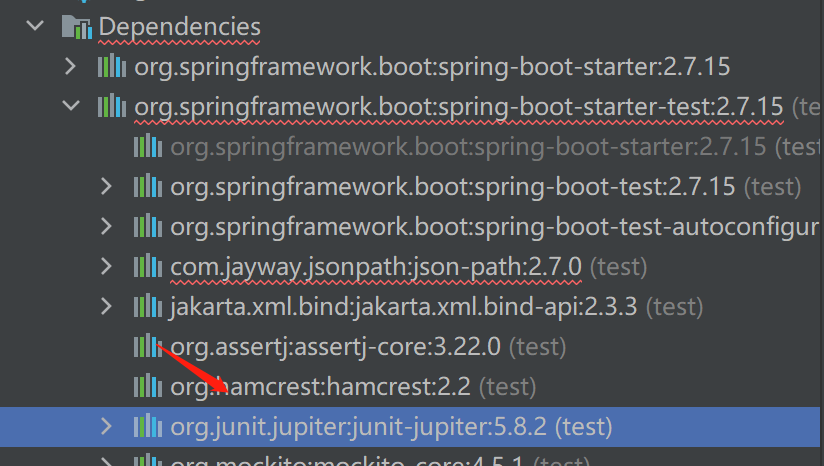
对于我使用的这个 SpringBoot 版本(2.7.15),其默认包含的 Junit 版本是 5.8.2。
1.2.测试用例
添加一个简单的服务层用于测试:
public class BookServiceImpl implements BookService {
public void save() {
System.out.println("book has saved.");
}
}
创建一个对应的测试用例:
package cn.icexmoon.junitdemo.service;
public class BookServiceTests {
("SpringJavaInjectionPointsAutowiringInspection")
private BookService bookService;
public void testSave(){
bookService.save();
}
}
1.3.@SpringBootTest
与之前学习 相比,这里不需要添加测试的类启动器,以及加载 Spring 容器配置。只需要使用一个@SpringBootTest注解。
实际上查看@SpringBootTest注解就能看到,它包含一个@ExtendWith({SpringExtension.class})注解。这个注解实际上就是 JUnit5 指定类启动器的方式。
类似的,使用@SpringBootTest注解也会默认扫描并加载项目的主配置类,对于 SpringBoot 来说,这个主配置类就是@SpringBootApplication标记的入口类:
public class JunitDemoApplication {
public static void main(String[] args) {
SpringApplication.run(JunitDemoApplication.class, args);
}
}
查看@SpringBootApplication的定义可以看到,它包含一个@SpringBootConfiguration注解,该注解又包含@Configuration注解,所以这个入口类同样也是 SpringBoot 的主配置类。
这种行为是按照测试套件(类)所在的包向上逐层查找的,也就是说会先找cn.icexmoon.junitdemo.service包是否包含一个@SpringBootConfiguration标记的类,如果没有,就继续在上一级包cn.icexmoon.junitdemo中查找。
因此,如果我们没有按照默认规则创建测试类,而是在一个不存在的包下边创建,比如cn.icexmoon.test:
package cn.icexmoon.test;
// ...
public class BookServiceTests {
// ...
}
执行测试用例时就会报错:
java.lang.IllegalStateException: Unable to find a @SpringBootConfiguration, you need to use @ContextConfiguration or @SpringBootTest(classes=...) with your test
说的很清楚,不能按照所属包自动找到@SpringBootConfiguration标记的类,也就不能帮助我们完成 Spring 容器加载。解决方案也告诉我们了,要么使用以前说过的@ContextConfiguration加载一个 Spring 配置类完成容器加载,要么使用@SpringBootTest的classes属性指定主配置类。
这里用后者:
package cn.icexmoon.test;
// ...
(classes = JunitDemoApplication.class)
public class BookServiceTests {
// ...
}
2.整合 MyBatis
先回顾一下,在之前介绍过 ,主要有以下步骤:
-
在配置文件(properties 或 yml)中定义数据库连接信息
-
定义一个使用连接信息的 JDBC 数据源(DataSource)作为 Spring Bean
-
使用数据源创建一个 MyBatis 的连接对象(SqlSessionFactoryBean)作为 Spring Bean
-
在连接对象中设置 MyBatis 类型别名的包扫描
-
定义一个对 Mapper 接口的包扫描配置作为 Spring Bean
下面看如何在 SpringBoot 中整合 MyBatis。
2.1.依赖
先重新创建也给示例项目,在初始化器的依赖选项中勾选以下依赖:

自动生成的 POM 文件中有以下几个依赖比较关键:
<dependencies>
    <dependency>
        <groupId>org.mybatis.spring.boot</groupId>
        <artifactId>mybatis-spring-boot-starter</artifactId>
        <version>2.3.1</version>
    </dependency>
    <dependency>
        <groupId>com.mysql</groupId>
        <artifactId>mysql-connector-j</artifactId>
        <scope>runtime</scope>
    </dependency>
</dependencies>
mybatis-spring-boot-starter 这个 starter 包含了以下依赖:
-
spring-boot-starter,SpringBoot 框架相关依赖
-
spring-boot-starter-jdbc,SpringBoot 框架和 spring-jdbc
-
spring-boot-autoconfigure,SpringBoot 自动配置
-
mybatis,MyBatis 本体
-
mybatis-spring,MyBatis 对 SpringAPI 的实现(整合)
mysql-connector-j 这个依赖很单纯,就是 MySQL 驱动。
有了这两个依赖项,我们的应用就相当拥有了 Spring Boot+MyBatis+JDBC+MySQL 驱动。换言之,可以操作数据库了。
2.2.配置文件
在配置文件中添加数据库连接信息:
spring
datasource
driver-class-namecom.mysql.cj.jdbc.Driver
usernameroot
passwordmysql
urljdbcmysql//localhost3306/mybatis
2.3.Mapper
添加实体类和 Mapper:
public class Book {
private Integer id;
private String type;
private String name;
private String description;
}
public interface BookMapper {
("select * from tbl_book where id=#{id}")
Book selectById(int id);
}
服务层:
public class BookServiceImpl implements BookService {
("SpringJavaInjectionPointsAutowiringInspection")
private BookMapper bookMapper;
public Book getBookById(int id) {
return bookMapper.selectById(id);
}
}
2.4.测试
测试用例:
public class BookServiceTests {
private BookService bookService;
public void testGetBookById(){
Book book = bookService.getBookById(1);
System.out.println(book);
}
}
运行会报错:
Field bookMapper in cn.icexmoon.mybatisdemo.service.impl.BookServiceImpl required a bean of type 'cn.icexmoon.mybatisdemo.mapper.BookMapper' that could not be found.
这是因为因为我们没有配置对 Mapper 接口的包扫描,Spring 不知道在哪里找 Mapper 接口,也就不会对相应的接口实现动态代理,作为 Bean 引用的时候就会报错。
2.5.@Mapper
解决这个问题只需要为相应的 Mapper 接口加上一个@Mapper注解就行了:
public interface BookMapper {
("select * from tbl_book where id=#{id}")
Book selectById(int id);
}
2.6.更换数据源
上面的示例中,我们没有配置数据源,此时 MyBatis 会使用默认的数据源,当然我们也可以变更数据源。
添加 Druid 依赖:
<dependency>
    <groupId>com.alibaba</groupId>
    <artifactId>druid</artifactId>
    <version>1.2.17</version>
</dependency>
修改配置文件,使用 Druid 作为数据源:
spring
datasource
driver-class-namecom.mysql.cj.jdbc.Driver
usernameroot
passwordmysql
urljdbcmysql//localhost3306/mybatis
typecom.alibaba.druid.pool.DruidDataSource
如果自动联想没有提示 Druid 相关类型,可以检查 Maven 工具中是否已经加载了 Druid 依赖,如果没有,刷新一下 Maven 依赖。
非常方便,可以看到不再需要我们手动添加 Druid 数据源(DataSource)作为 Spring Bean 了。
3.整合页面
在前文中我介绍了如何在 SSM 框架中整合一个简单的图书增删改查页面,同样的,用 SpringBoot+MyBatis 我们也可以,而且会更加简单。
新建一个 SpringBoot 项目 page-demo,选择 Web、MyBatis、MySQL 等相关依赖。
添加配置文件:
server
port80
spring
datasource
driver-class-namecom.mysql.cj.jdbc.Driver
usernameroot
passwordmysql
urljdbcmysql//localhost3306/mybatis
typecom.alibaba.druid.pool.DruidDataSource
添加 Druid 依赖:
<dependency>
    <groupId>com.alibaba</groupId>
    <artifactId>druid</artifactId>
    <version>1.2.17</version>
</dependency>
将之前项目的实体类、持久层、服务层、控制层代码依次拷贝进新项目复用,这其中还需要引入一些辅助类,比如统一的返回值封装和异常处理等,也需要添加新的依赖(AspectJ 相关注解的依赖)等。
一切搞好之后可以使用 HTTP 调试工具进行测试。
最后加入页面。之前我们的程序是打包成 war 包,部署到 Tomcat 中运行,所以页面是放在 webapp 这个目录下,并且在 Servlet 相关配置中设置了静态资源路径过滤。
现在使用 SpringBoot,是打 jar 包,并用内置的 Tomcat 运行,静态页面我们可以直接放在resources/static下。
关于 SpringBoot 的静态资源目录的更多说明,可以查看。
现在访问 http://localhost/pages/books.html 就能看到示例页面。
如果出现在 static 目录中添加了页面,但无法访问的问题,可以尝试用 Maven 工具清除编译目录(target)后重新编译打包运行程序。
还可以在 /resources/static 目录下添加一个 index.html 作为程序的首页:
<script>
    document.location.href="/pages/books.html";
</script>
内容很简单,用 js 代码跳转到图书编辑页面。
The End,谢谢阅读。
本文的完整示例可以从
4.参考资料


文章评论