本篇文章使用的示例项目为 ,对应的数据库测试数据为 。
1.REST 风格接口
在示例项目中,我创建了一些 REST 风格的接口:
-
POST http://localhost/users,添加用户
-
GET http://localhost/users/1,获取用户详情
-
PUT http://localhost/users/7,修改用户
-
DEL http://localhost/users/7,删除用户
如果不了解 REST,可以观看这个
对应的接口调用示例可以参考。
2.简化开发
2.1.@ResponseBody
如果观察控制层代码的结构,就能发现一些共同点:
// ...
("/users")
public class UserController {
private UserService userService;
(value = "/{id}", method = RequestMethod.GET)
public WebResult<User> getUserInfo(("id") Integer id){
User user = userService.getById(id);
return WebResult.success(user);
}
(value = "/{id}", method = RequestMethod.DELETE)
public WebResult<Object> deleteUser(("id") Integer id){
userService.deleteById(id);
return WebResult.success();
}
(value = "", method = RequestMethod.POST)
public WebResult<Integer> addUser( User user){
userService.save(user);
return WebResult.success(user.getId());
}
(value = "/{id}", method = RequestMethod.PUT)
public WebResult<Object> updateUser(("id") Integer id, User user){
user.setId(id);
userService.update(user);
return WebResult.success();
}
}
每个方法都用@ResponseBody注解标记,因为返回的都是作为 HTTP 响应报文体的 json 串。
所以可以进行简化,将@ResponseBody注解在控制层类上进行定义,这样就不需要为每个方法添加:
("/users")
public class UserController {
// ...
(value = "/{id}", method = RequestMethod.GET)
public WebResult<User> getUserInfo(("id") Integer id){
// ...
}
// ...
}
2.2.@RestController
实际上可以进一步简化,将@Controller和@ResponseBody合并,用一个@RestController注解替换:
("/users")
public class UserController {
// ...
}
事实上@RestController注解是一个组合注解:
public @interface RestController {
// ...
}
2.3.@GetMapping
当我们使用 REST 风格接口时,需要为每个接口指定具体的 HTTP 方法,所以@RequestMapping注解的method属性都要定义,同样的,可以进行简化:
(value = "/{id}", method = RequestMethod.GET)
可以被替换成:
("/{id}")
类似的注解还有:
-
@DeleteMapping -
@PostMapping -
@PutMapping
3.页面调用
这里有一个,解压后可以放在/webapp目录下。
但是访问页面 http://localhost/pages/book.html 会显示 404 错误。
3.1.放行静态资源
这是因为在 Servlet 容器初始化配置中我们已经让 SpringMVC 拦截了所有请求:
public class ServletContainerInitConfig extends AbstractAnnotationConfigDispatcherServletInitializer {
protected String[] getServletMappings() {
return new String[]{"/"};
}
// ...
}
需要添加一个WebMvcConfigurationSupport的子类,并在其中设置需要直接访问的静态资源:
public class SpringMvcSupport extends WebMvcConfigurationSupport {
protected void addResourceHandlers(ResourceHandlerRegistry registry) {
registry.addResourceHandler("/pages/**").addResourceLocations("/pages/");
registry.addResourceHandler("/css/**").addResourceLocations("/css/");
registry.addResourceHandler("/js/**").addResourceLocations("/js/");
registry.addResourceHandler("/plugins/**").addResourceLocations("/plugins/");
}
}
addResourceHandler方法设置请求资源的 url 路径,addResourceLocations设置资源对应的目录。
这里不能使用
classpath:/pages/,因为我们的 html 相关资源是放在webapp目录下的。
还需要让SpringMvcSupport这个类作为 Spring Bean:
({"cn.icexmoon.mvcdemo.controller","cn.icexmoon.mvcdemo.config"})
public class SpringMvcConfig {
}
这里只能用
@ComponentScan扫描并加载SpringMvcSupport,不能使用@Import注解加载,否则无法正常显示页面,原因不明。
现在请求 http://localhost/pages/books.html 就能看到页面。
在数据库中导入测试数据 。
3.2.展示图书列表
前端的列表页加载使用的是 GET http://localhost/books 这个接口,用 MyBatis 实现表数据查询,并实现一个查询所有图书的接口:
("/books")
public class BookController {
private BookService bookService;
public WebResult<List<Book>> getAllBooks(){
List<Book> allBooks = bookService.getAllBooks();
return WebResult.success(allBooks);
}
}
在前端请求数据的 js 代码中处理返回值:
//列表
getAll() {
    axios.get("/books").then((res)=>{
        this.dataList = res.data.data;
    })
},
3.3.添加图书
用类似的方式可以实现图书添加,服务端不再赘述,前端页面:
var vue = new Vue({
// ...
methods: {
// ...
//弹出添加窗口
handleCreate() {
this.dialogFormVisible = true;
this.resetForm();
},
//重置表单
resetForm() {
this.formData = {}
},
//添加
handleAdd() {
axios.post("/books", this.formData).then((res) => {
if (res.data.success) {
this.dialogFormVisible = false;
this.$message.success("添加成功");
}
else{
this.$message.error("添加失败");
}
}).finally(()=>{
this.getAll();
});
},
}
})
3.4.编辑图书
编辑图书:
var vue = new Vue({
    // ...
    methods: {
        // ...
        //弹出编辑窗口
        handleUpdate(row) {
            //查询图书详情
            axios.get("/books/" + row.id).then((res) => {
                if (res.data.success) {
                    this.formData = res.data.data;
                    this.dialogFormVisible4Edit = true;
                } else {
                    this.$message.error(res.data.errorMsg);
                }
            })
        },
        //编辑
        handleEdit() {
            axios.put("/books/" + this.formData.id, this.formData).then((res) => {
                if (res.data.success) {
                    this.dialogFormVisible4Edit = false;
                    this.$message.success("编辑成功");
                } else {
                    this.$message.error("编辑失败");
                }
            }).finally(() => {
                this.getAll();
            });
        },
    }
})
3.5.删除图书
删除图书:
var vue = new Vue({
    // ...
    methods: {
        // ...
        // 删除
        handleDelete(row) {
            // 弹出提示框
            this.$confirm("是否要永久删除当前数据?", "提示", {
                type: 'info'
            }).then(() => {
                //确定
                axios.delete("/books/" + row.id).then((res) => {
                    if (res.data.success) {
                        this.$message.success("删除成功");
                        this.getAll();
                    } else {
                        this.$message.error(res.data.errorMsg);
                    }
                });
            }).catch(()=>{
                this.$message.info("取消删除");
            });
        }
    }
})
4.异常处理
4.1.异常处理器
接口调用是可能出现异常的,比如查询图书详情的接口,本来应该传图书id:
http://localhost/books/1
但客户端请求时使用了字母:
http://localhost/books/ss
服务端就会产生一个异常:
[WARNING] Resolved [org.springframework.web.method.annotation.MethodArgumentTypeMismatchException: Failed to convert value of type 'java.lang.String' to required type 'java.lang.Integer'; nested exception is java.lang.NumberFormatException: For input string: "ss"]
此时前端会收到一个 Tomcat 错误页面的 Html 内容,而非 json 化的错误信息:
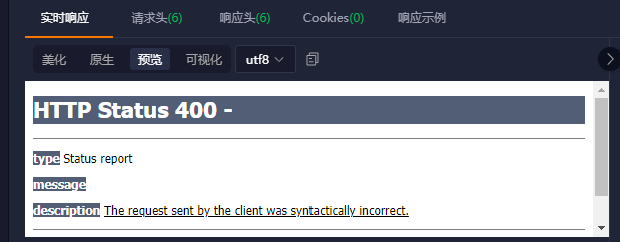
这个问题可以用异常处理器来解决,通过它我们可以拦截特定的异常并给客户端返回统一格式的错误信息。
public class MyExceptionAdvice {
(MethodArgumentTypeMismatchException.class)
public WebResult<Object> handleException(MethodArgumentTypeMismatchException e){
return WebResult.fail(WebResult.DEFAULT_INPUT_ERROR, e.getMessage());
}
}
异常拦截器主要用于拦截和封装表现层产生(或接收到)的异常,所以可以放在
/controller目录下。异常处理器是用 AOP 实现的。
现在再请求错误的 url:
{
    "success": false,
    "errorCode": "error.input",
    "errorMsg": "Failed to convert value of type 'java.lang.String' to required type 'java.lang.Integer'; nested exception is java.lang.NumberFormatException: For input string: \"ss\"",
    "data": null
}
4.2.自定义异常
在实际开发中,我们通常需要使用到自定义异常。在实践中,将自定义异常分为系统异常和业务异常进行区分是一个良好实践。
系统异常和业务异常区分后的好处在于,对于业务异常,通常是因为客户端输入错误造成的,可以直接显示错误信息给客户端。对于系统异常,直接显示具体的错误信息(比如数据库连接超时)给用户会造成困扰,通常只要显示一个笼统的“系统出错,请稍后再试”即可,详细的错误信息只用于提醒运维人员和帮助开发人员定位错误。
先定义异常会使用的错误码,考虑到异常分为系统异常和业务异常,所以这里错误码也分为对应的两套错误码,并用内嵌的枚举类型定义。为了能统一使用错误码,需要为两种不同的枚举类型定义一个共同的接口:
public interface IErrorCode {
    String getErrorCode();
    String getDesc();
}
枚举类型不能继承和被继承,因为它们隐式继承自
Enum<T>。
定义一个自定义异常的抽象基类:
public abstract class AbsCustomException extends RuntimeException {
private final IErrorCode errorCode;
public AbsCustomException(IErrorCode errorCode, String message, Throwable cause) {
super(message, cause);
this.errorCode = errorCode;
}
public AbsCustomException(IErrorCode errorCode, Throwable cause) {
super(errorCode.getDesc(), cause);
this.errorCode = errorCode;
}
public AbsCustomException(IErrorCode errorCode) {
super(errorCode.getDesc());
this.errorCode = errorCode;
}
public AbsCustomException(IErrorCode errorCode, String message) {
super(message);
this.errorCode = errorCode;
}
}
定义系统异常:
public class SystemException extends AbsCustomException{
public SystemException(ErrorCode errorCode, String message, Throwable cause) {
super(errorCode, message, cause);
}
public SystemException(ErrorCode errorCode, Throwable cause) {
super(errorCode, cause);
}
public SystemException(ErrorCode errorCode) {
super(errorCode);
}
public SystemException(ErrorCode errorCode, String message) {
super(errorCode, message);
}
/**
* 系统异常的错误码
*/
public enum ErrorCode implements IErrorCode {
UNKNOWN("system.unknown","未知错误"),
DB_CONN_TIMEOUT("system.db.timeout", "数据库连接超时"),
CODE_WRITE("system.code.write","代码书写错误");
private final String errorCode;
private final String desc;
ErrorCode(String errorCode, String desc) {
this.errorCode = errorCode;
this.desc = desc;
}
public String getErrorCode() {
return errorCode;
}
public String getDesc() {
return desc;
}
}
}
定义业务异常:
public class BusinessException extends AbsCustomException{
public BusinessException(ErrorCode errorCode, String message, Throwable cause) {
super(errorCode, message, cause);
}
public BusinessException(ErrorCode errorCode, Throwable cause) {
super(errorCode, cause);
}
public BusinessException(ErrorCode errorCode) {
super(errorCode);
}
public BusinessException(ErrorCode errorCode, String message) {
super(errorCode, message);
}
/**
* 业务异常的错误码
*/
public enum ErrorCode implements IErrorCode{
USER_INPUT("business.user.input","用户输入错误"),
USER_PARAMS_CHECK("business.user.params.check","用户输入参数检查出错");
private final String errorCode;
private final String desc;
ErrorCode(String errorCode, String desc) {
this.errorCode = errorCode;
this.desc = desc;
}
public String getErrorCode() {
return errorCode;
}
public String getDesc() {
return desc;
}
}
}
为这两种异常添加异常处理器:
public class MyExceptionAdvice {
/**
* 处理业务异常
*
* @param e
* @return
*/
(BusinessException.class)
public WebResult<Object> handleBusinessException(BusinessException e) {
System.out.println(e);
return WebResult.fail(e.getErrorCode().getErrorCode(), e.getMessage());
}
/**
* 处理系统异常
*
* @param e
* @return
*/
(SystemException.class)
public WebResult<Object> handleSystemException(SystemException e) {
//记录日志
//发送邮件通知相关人员
System.out.println(e);
return WebResult.fail(e.getErrorCode().getErrorCode(), "系统出错,请稍后重新再试");
}
}
在异常处理器中,除了针对异常类型(系统异常 or 业务异常)给客户端返回用户友好的错误提示信息以外,我们还可以针对异常类型的不同进行一些额外处理。比如对于系统异常,通常需要记录日志,并提醒相关人员有系统异常产生,可能需要排查系统问题等。
显然,必然会存在某些因为疏漏没有被纳入自定义异常范围的异常产生,因此需要定义一个默认的异常处理器进行“兜底”:
public class MyExceptionAdvice {
// ...
/**
* 处理未定义的异常
*
* @param e
* @return
*/
(Exception.class)
public WebResult<Object> handleOtherException(Exception e) {
//将未定义异常当做未知的系统异常进行处理
return handleSystemException(new SystemException(SystemException.ErrorCode.UNKNOWN, "未定义异常", e));
}
}
当然,这是个权宜之计,可以像示例中这样,现将这些异常当做未知的系统异常进行记录和处理,但之后我们最好对这些未知系统异常进行分析和排查,将其纳入自定义异常的范畴中进行管理。
大多数异常都可以在控制层捕获到,因此我们可以利用 AOP 在控制层对明确的异常进行转换,将其转换为自定义异常:
(1)
public class ControllerExceptionExchangeAspect {
("execution(public * cn.icexmoon.mvcdemo.controller.*Controller.*(..))")
public void anyControllerMethods() {
}
("anyControllerMethods()")
public Object changeException(ProceedingJoinPoint pjp) throws Throwable {
try {
return pjp.proceed();
} catch (Exception e) {
// 将已知的异常重新包装为业务异常
if (e instanceof ArithmeticException) {
throw new SystemException(SystemException.ErrorCode.CODE_WRITE, "除零异常", e);
}
throw e;
}
}
}
这里需要添加 AOP 相关依赖以及开启 AOP 相关功能,具体可以参考。
这里对所有的控制层 pulic 方法调用尝试捕获异常,如果捕获到的异常类型是ArithmeticException,就将其转换为系统异常进行抛出,这样对应的异常处理器就能正常处理并返回定义良好的错误信息。
可以在接口中故意添加一个除零错误代码进行检验:
("/{id}")
public WebResult<Book> getBookInfo(("id") Integer id){
Book book = bookService.getBookById(id);
int i = 1/0;
return WebResult.success(book);
}
请求对应的接口就能看到效果。
需要注意的是,并非所有异常都能够在控制层用 AOP 捕获,比如前面演示过的:
GET http://localhost/books/ss
这样的客户端请求,因为路径参数类型错误,并不会进入具体的控制层方法,框架会产生一个MethodArgumentTypeMismatchException异常。这些异常只能在异常处理器中定义和处理:
public class MyExceptionAdvice {
// ...
(MethodArgumentTypeMismatchException.class)
public WebResult<Object> handleOtherBusinessException(Exception e) {
if (e instanceof MethodArgumentTypeMismatchException) {
return handleBusinessException(new BusinessException(BusinessException.ErrorCode.USER_INPUT, "用户输入的参数类型不正确", e));
} else {
return handleOtherException(e);
}
}
}


文章评论