
图源:
虽然说可以通过yum直接从自带的仓库傻瓜式安装,但nginx往往需要重新编译以添加诸如SSL等模块,所以从官网下载源码编译安装是更稳妥的做法。
可以从官网的这个页面下载相应的Nginx版本:
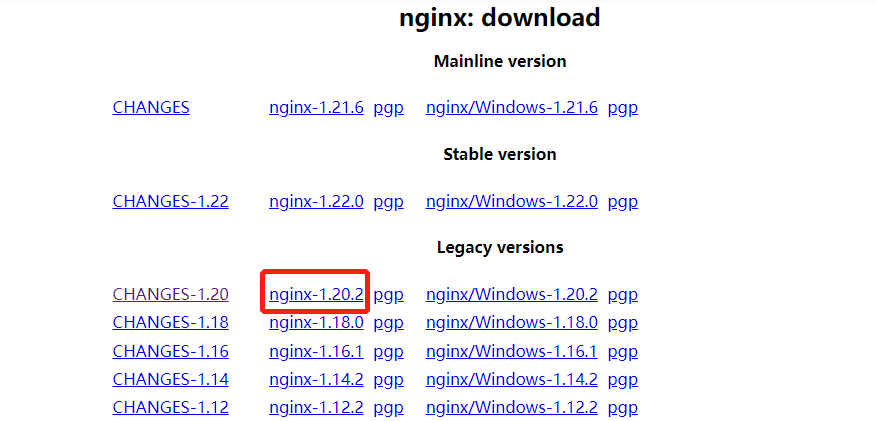
我这里为了和公司测试机上版本保持一致,选择了1.20.2,自己用的话还是选择最新的Stable版本即可。
使用wget或者其它工具下载到服务器:
cd /usr/src
wget http://nginx.org/download/nginx-1.20.2.tar.gz
/usr/src是Linux推荐的存放源码的目录,如果需要保留源码(方便之后重新编译以添加模块),最好在这个目录下下载源码包和解压。关于更多的Linux文件目录约定(FHS)可以阅读。
解压并进入源码目录:
tar -zxvf nginx-1.20.2.tar.gz
cd nginx-1.20.2/
设置安装参数:
./configure --prefix=/usr/local/nginx --with-http_ssl_module
这里--prefix指定的是安装目录,同样的,根据FHS推荐,最好安装在/usr/local/nginx下。--with-http_ssl_module是为了将SSL模块编译进去,以便使用OpenSSL证书提供HTTPS支持,当然如果不需要也可以不加。
如果出现错误信息:
./configure: error: the HTTP gzip module requires the zlib library.
You can either disable the module by using --without-http_gzip_module
option, or install the zlib library into the system, or build the zlib library
statically from the source with nginx by using --with-zlib=<path> option.
说明缺少
zlib库,需要安装:sudo yum install zlib-devel安装好后重新执行
/configure命令即可。
创建安装目录:
mkdir /usr/local/nginx
编译并安装:
make
make install
为了方便使用,还需要创建软链接:
ln -s /usr/local/nginx/conf/ /etc/nginx
ln -s /usr/local/nginx/sbin/nginx /usr/bin/nginx
需要注意的是,将
conf目录映射到/etc/nginx下时需要确保/etc/nginx目录不存在,否则就会映射到/etc/nginx/conf目录。如果这里不做映射,就会导致后边无法顺利申请OpenSSL证书。
一切都OK后可以通过nginx -v查看是否安装完毕。
配置
Nginx的主配置文件位于安装目录的./conf/nginx.conf。
Nginx安装目录本身就有配置示例,这里再提供一个个人使用的配置示例:
#user  nobody;
worker_processes  1;

#error_log  logs/error.log;
#error_log  logs/error.log  notice;
#error_log  logs/error.log  info;

#pid        logs/nginx.pid;


events {
    worker_connections  1024;
}


http {
    include       mime.types;
    default_type  application/octet-stream;

    #access_log  logs/access.log  main;

    sendfile        on;
    #tcp_nopush     on;

    #keepalive_timeout  0;
    keepalive_timeout  65;

    #gzip  on;


server {
	listen 80;
	server_name xx.xx.xx.xx;
	location /api {
		add_header Access-Control-Allow-Origin *;
		proxy_pass http://127.0.0.1:8080/api/;
		proxy_redirect default;
		proxy_set_header Host $host;
		proxy_set_header X-Real-IP $remote_addr;
	}

	location / {
		root  /mnt/xxxx/dist/;
		index index.html;
		try_files $uri $uri/ /index.html =404;
	}

	error_page   500 502 503 504  /50x.html;
	location = /50x.html {

		root 	html;
	}

	location /upload {
		alias /mnt/xxxx/upload/;
		autoindex on;
	}

	location /h5 {
		alias /mnt/xxxx/h5/;
		index index.html;

	}
}
    include conf.d/*;
}
这里配置的是一个前后端分离的Spring Boot项目,代码部署在/mnt/xxxx下,后台接口的访问路径是/api,前端代码的静态路径是/h5和/,前者是移动端,后者是后台。
这里后台接口因为是用Spring Boot自带的Nginx独立运行并伺服8080端口,所以这里Nginx做了反向代理。将请求转发到127.0.0.1:8080,当然用localhost:8080也是一样的。
总之,配好了适合自己项目的配置文件后就可以启动Nginx了:
nginx
如果一切正常的话可以用浏览器看到网站了。
如果浏览器无法正常访问,可以用 TCP 工具检查是否可以正常连接目标服务器的 80 端口,比如:
telnet 192.168.0.88 80
如果不能正常访问,查看服务端防火墙设置:
sudo firewall-cmd --list-rich-rules
如果没有放行 80 端口,添加放行规则,具体可以参考文章。
Systemd 服务
虽然使用命令可以启动或停止 Nginx,但方便起见还是最好添加 Systemd 服务:
sudo vim /etc/systemd/system/nginx.service
内容:
[Unit]
Description=The NGINX HTTP and reverse proxy server
After=network.target network-online.target

[Service]
Type=forking
PIDFile=/usr/local/nginx/logs/nginx.pid
ExecStartPre=/usr/local/nginx/sbin/nginx -t
ExecStart=/usr/local/nginx/sbin/nginx
ExecReload=/usr/local/nginx/sbin/nginx -s reload
ExecStop=/bin/kill -s QUIT $MAINPID
PrivateTmp=true
Restart=on-failure

[Install]
WantedBy=multi-user.target
重新加载服务配置:
sudo systemctl daemon-reload
如果已经启动,先停止 Nginx:
sudo nginx -s stop
启动服务:
sudo systemctl start nginx
sudo systemctl enable nginx
证书
要申请OpenSSL证书可以参考这篇文章:
按文章内容一步步做即可。
如果出现问题可以检查:
-
Nginx是否正常运行。
-
是否对Nginx的应用和配置目录添加了软链接。
最后修改配置使用证书可以参考:
server {
        listen       443;

        ssl on;
        server_name  kevin.xxx.com;

        ssl_certificate /etc/letsencrypt/live/kevin.xxx.com/fullchain.pem;
        ssl_certificate_key /etc/letsencrypt/live/kevin.xxx.com/privkey.pem;

        location / {
            root   /opt/www/test;
            index  index.html index.htm;
        }

        location /api {
            add_header Access-Control-Allow-Origin *;
            proxy_pass http://127.0.0.1:8080/api/;
            proxy_redirect default;
            proxy_set_header Host $host;
            proxy_set_header X-Real-IP $remote_addr;
    	}
}
在原本监听80端口的基础上额外配置一个监听443的服务即可,当然更恰当的做法是让80端口的服务自动跳转到443端口以强制客户端使用HTTPS。
修改好配置文件后可以通过以下命令检查是否正确:
nginx -tc /etc/nginx/nginx.conf
如果有错误,按相应的错误信息排查即可。
如果启动Nginx出现问题,可以查看Nginx的相应日志,Nginx的日志位于/var/log/nginx下。


文章评论